紧接上一部分
更新系统的建立 更新系统即是所说的SyncAdapter , 实现了这个系统服务, 就可以利用系统的定时器对程序数据ContentProvider进行更新, 也可以在系统设置->账号里面控制开启或者关闭(如果SyncAdapter的配置文件允许的话)
完成这些服务的布置大概有三步
创建SyncService并提供SyncAdapter的IBinder接口以便让系统调用
声明Sync服务, 并制定SyncAdapter的配置文件
生成账户启动Sync
第一步 Sync服务一般工作在独立的进程, 并且可由操作系统调度, 当然要实现自己的Binder接口, 好在Google已经提供了非常简单的抽象类AbstractThreadedSyncAdapter来完成这件事情.
我们直接看代码
1
2
3
4
5
6
7
8
9
10
11
12
13
14
15
16
17
18
19
20
21
22
23
24
25
26
27
28
29
30
31
32
33
public class SyncService extends Service { private static final Object syncLock = new Object (); private static SyncAdapter syncAdapter = null ; @Override public void onCreate () { super .onCreate(); synchronized (syncLock) { if (syncAdapter == null ) { syncAdapter = new SyncAdapter (getApplicationContext(), true ); } } } @Override public IBinder onBind (Intent intent) { return syncAdapter.getSyncAdapterBinder(); } class SyncAdapter extends AbstractThreadedSyncAdapter { public SyncAdapter (Context context, boolean autoInitialize) { super (context, autoInitialize); } @Override public void onPerformSync (Account account, Bundle extras, String authority, ContentProviderClient provider, SyncResult syncResult) { } } }
由代码可以看出, 定义的SyncService会提供已经SyncAdapter的Binder对象, 这样就可以通过连接这个同步服务来完成同步啦, 当然这些事情都是交给操作系统的, 所以这个Service的声明有讲究的地方.
第二步 正如第一步最后所讲, 此服务需能交给操作系统使唤, 那么声明也需要加入一些表示, 具体如下.
1 2 3 4 5 6 7 8 9 10 11 <service android:name =".sync.SyncService" android:exported ="true" android:process =":sync" > <intent-filter > <action android:name ="android.content.SyncAdapter" /> </intent-filter > <meta-data android:name ="android.content.SyncAdapter" android:resource ="@xml/sync_adapter" /> </service >
可以看出这个服务必须exported , 有无独立进程并不是必须的, 并且必须指定 android.content.SyncAdapter为过滤器, 以让系统可以在启动的时候注册该服务
最后还需要指定SyncAdapter的配置文件
1 2 3 4 5 6 7 <sync-adapter xmlns:android ="http://schemas.android.com/apk/res/android" android:contentAuthority ="org.weyoung.notebook.provider" android:accountType ="org.weyoung.notebook" android:userVisible ="true" android:supportsUploading ="false" android:allowParallelSyncs ="false" android:isAlwaysSyncable ="true" />
userVisible决定了是否在系统Settings的Account里面可以看到更新记录, 并且控制开启与关闭
supportsUploading决定在Provider notifyChanged 的时候, syncToNetwork是否起作用, 如果前者为true, 那么后者为true的时候可以触发SyncAdapter onPerformSync的回调
第三步 万事俱备, 只欠东风
同步的启动必须指定所谓的账号Account, 关于账号系统我们会在Part Three里面提到, 可以通过伪代码来看看如何配置ContentProvider的更新
1 2 3 4 5 6 7 8 9 10 Account account = AccountService.GetAccount();AccountManager accountManager = (AccountManager) context.getSystemService(Context.ACCOUNT_SERVICE);if (accountManager.addAccountExplicitly(account, null , null )) { ContentResolver.setIsSyncable(account, CONTENT_AUTHORITY, 1 ); ContentResolver.setSyncAutomatically(account, CONTENT_AUTHORITY, true ); ContentResolver.addPeriodicSync(account, CONTENT_AUTHORITY, new Bundle (), SYNC_FREQUENCY); }
手动触发更新可以使用requestSync
1
2
3
4
5
6
7
Bundle b = new Bundle ();b.putBoolean(ContentResolver.SYNC_EXTRAS_MANUAL, true ); b.putBoolean(ContentResolver.SYNC_EXTRAS_EXPEDITED, true ); ContentResolver.requestSync( AccountService.GetAccount(), CONTENT_AUTHORITY, b);
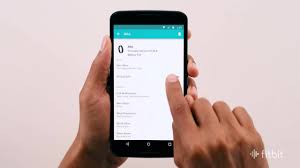
这样就可以在系统的账号里面看到我们的程序啦
下一部分, 我们将完成整个程序, 添加最后的账号模块, 敬请期待吧
Reference


